TURBO BOOST

Motorcycle Oil Change, a DIY

Motorcycle Oil Change, a DIY

Bike maintenance is regularly inspecting, cleaning, and adjusting various components of a bicycle to keep it in good working condition and extend its lifespan. It involves checking and maintaining things like the tires, brakes, chain, gears, and other parts to ensure a safe and smooth ride. Proper maintenance also helps prevent costly repairs and increases the performance of your bike. It is important to maintain regular maintenance, especially if you frequently use your bike, to avoid potential safety hazards and ensure an enjoyable riding experience.

Here are a few simple tasks that you can do at home to maintain your motorbike:

  • Check the oil level and change the oil regularly as recommended by the manufacturer.
  • Clean and lubricate the chain to ensure smooth and efficient operation.
  • Check and adjust the tire pressure regularly to ensure safe and stable handling.
  • Check the battery and charging system to ensure that the bike starts easily and runs smoothly.
  • Clean the air filter to maintain optimal air-fuel mixture and prevent engine damage.
  • Check and tighten all bolts and nuts regularly to prevent loose parts and potential accidents.
  • Inspect the brakes and brake fluid level to ensure proper stopping power.


By performing these simple tasks regularly, you can help to keep your motorbike in good condition, reduce the risk of breakdowns, and extend its lifespan.

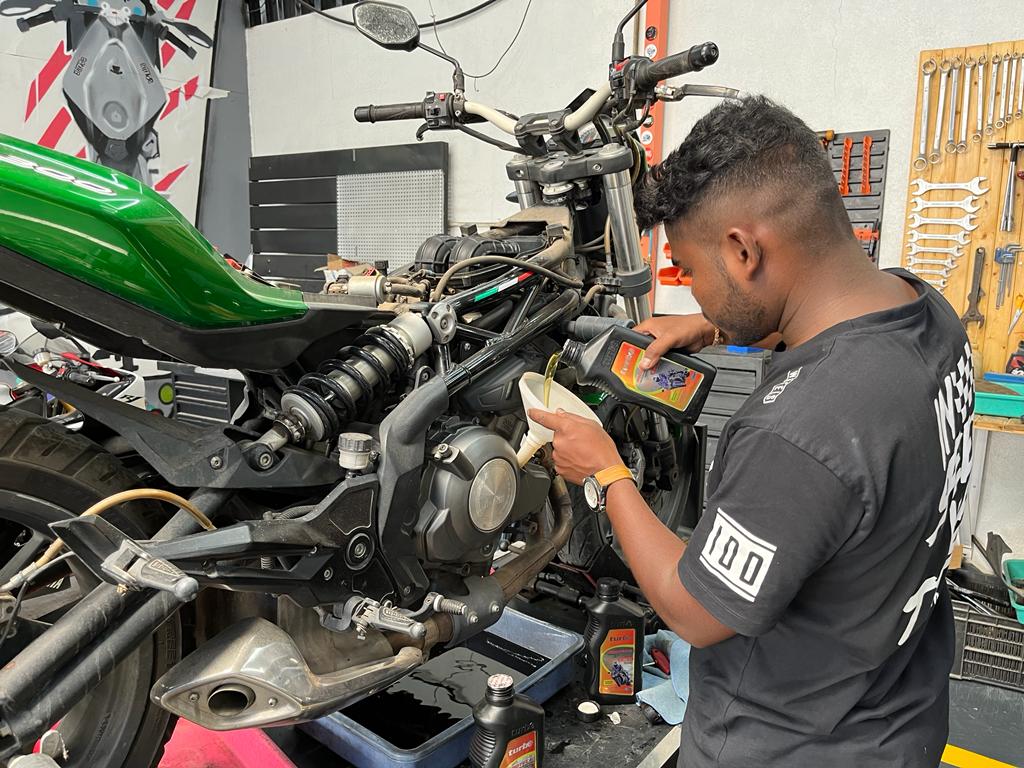
Changing the oil in a motorcycle is a relatively simple process that can be done in a few easy steps. Here’s how:

  1. Gather the necessary materials: You will need a new oil filter, oil, a wrench, a funnel, and a drain pan.
  2. Locate the oil drain bolt: This is usually located near the bottom of the engine and is the bolt that will release the used oil.
  3. Warm up the engine: Start the motorcycle and let it run for a few minutes to warm up the oil. This will help the oil to flow more easily and drain better.
  4. Place the drain pan under the drain bolt: Place the drain pan directly under the drain bolt to catch the used oil as it drains out.
  5. Remove the drain bolt: Use a wrench to loosen and remove the drain bolt, allowing the oil to drain into the pan.
  6. Replace the oil filter: Once the oil has finished draining, remove the old oil filter and replace it with a new one.
  7. Fill with new oil: Use a funnel to pour the new oil into the engine, being careful not to overfill. The recommended oil level is usually marked on the dipstick or oil filler cap.
  8. Replace the drain bolt: Replace the drain bolt and tighten it with the wrench.
  9. Check for leaks: Start the motorcycle and let it run for a few minutes, checking for any leaks or spills.
  10. Dispose of the used oil: Properly dispose of it by taking it to a recycling or automotive service center.


By following these steps, you should be able to change the oil in your motorcycle successfully. If you’re unsure of anything, consult the owner’s manual or take your bike to a professional mechanic.


Regular oil maintenance is important for the longevity and proper functioning of a motorcycle engine. This includes checking the oil level regularly, changing the oil and oil filter at the recommended intervals, and using the correct type of oil specified by the manufacturer. Neglecting oil maintenance can lead to decreased performance, increased wear and tear on engine components, and potentially costly repairs.


CATEGORIES

RECENT POSTS